Most extension wearers spend a lot of time researching the install. Almost none of them think about removal, which is backward. The install is where the hair gets added. Removal is when natural hair is most at risk, because it’s the point where adhesives, bonds, beads, and stitches are broken or cut away while the hair sits against a scalp that may have been under tension for weeks or months. Done badly, removal pulls out natural hair along with the extension hair. Done right, it leaves the natural hair intact and ready for either a break or a reinstall. Knowing the difference between those two outcomes is genuinely important if extensions are part of someone’s routine.
There’s an underlying health risk that doesn’t always get discussed openly in the salon. Traction alopecia is real, and it’s directly linked to extension wear when installation is too tight, bonds are placed too close to the scalp, or removal is rushed without proper technique. Tight installations cause pulling, pulling causes traction alopecia, and traction alopecia can become permanent if it goes uncorrected. Anyone shopping for Hair extensions in Centerville should be asking specifically about removal protocols. Not just the install.
Centerville residents have several salon options for extension work. AltaRd Salon LLC is one of the hair extension locations in Centerville on Miamisburg Centerville Road, offering installation, removal, and move-up services for the Dayton area. Nothing here recommends any one salon. It’s a walkthrough of what safe removal and reinstallation actually look like at a technical level, how different methods behave, and where salons cut corners when they’re not paying attention.
Why Removal Is the Most Skipped Conversation
Salons compete loudly on installation pricing and quality. Removal gets bundled into a vague “we’ll take them out when you’re ready” line that nobody questions. But the technique for removing tape-ins is completely different from that for removing keratin bonds. Removing hand-tied wefts requires patience, which the average stylist doesn’t always have. Bead removal needs the right tool and steady hands. None of it transfers from one method to another.
Picking a salon that knows what they’re doing with installation but not removal is risky. Many extension wearers find this out the hard way when they go in for a takedown and walk out with significantly less hair than they expected. So, asking about the removal protocol during the initial installation consultation isn’t paranoid. It’s standard.
See also: Why Every Defendant Needs a Criminal Defense Attorney in Miami
Removal Method Depends on the Install Method
Tape-in extensions are removed with a specific solvent that breaks down the medical-grade adhesive. The bond gets saturated, given time to soften, and the tape lifts cleanly without pulling. Skipping the solvent step and trying to peel them off mechanically removes natural hair along with the tape.
Keratin or fusion bonds need a different approach entirely. A bond-breaker product softens the keratin protein, and the bond is then carefully crushed and slid off. When done patiently, natural hair sheds nothing. Done aggressively, hair comes out attached to the bond. The American Academy of Dermatology’s guidance on preventing hair damage from weaves and extensions is direct on this point.
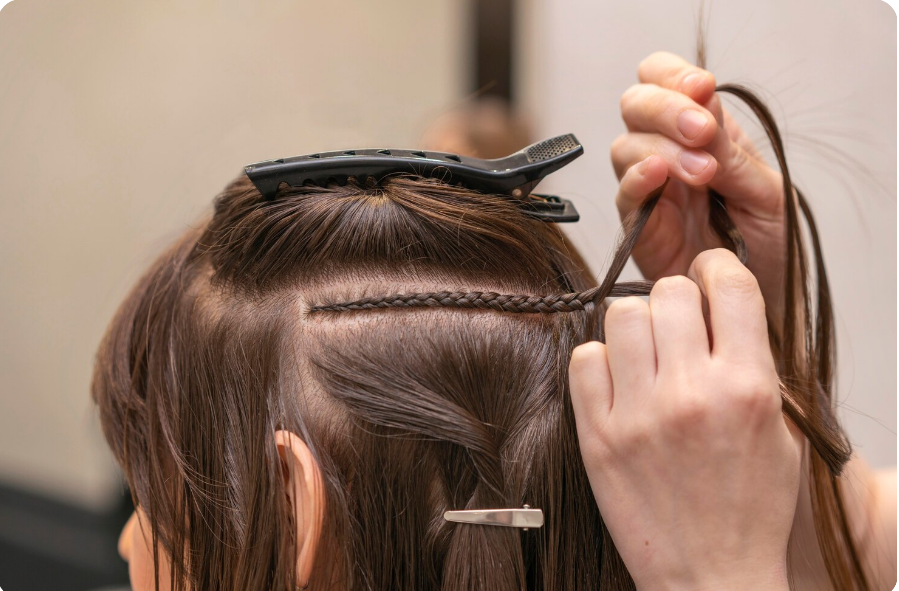
Hand-tied wefts sewn onto beaded foundations require first unsewing them, then sliding the beads off the natural hair with the bead-removal tool. The full process takes 45-90 minutes, depending on how many rows there are. Cutting through the wefts to speed it up also cuts natural hair.
Micro-links and i-tips come out by gently opening each bead, sliding the strand free, and removing the bead. There’s no chemistry involved. Just patience and the right tool.
Sew-ins on a braided foundation come out by cutting the thread (carefully, never near the scalp), unstitching the weft, and then carefully unbraiding the foundation cornrows. Damp hair makes the unbraiding easier.
What Happens Between Removal and Reinstall
The break between removal and reinstall is where much of the damage is either confirmed or prevented. Once the extensions are out, the natural hair gets a full clarifying wash to remove any product or bond residue. Then it’s evaluated. Density, texture, condition, scalp health, hairline integrity. Anything looking irritated, broken, or thinning gets noted.
This is also where the conversation about whether to reinstall immediately or wait a few weeks happens. A peer-reviewed paper on traction alopecia, triggered by postpartum telogen effluvium, notes that traction-driven hair loss often goes unnoticed until something else triggers a more dramatic shedding. Catching the early signs of traction damage between extension cycles is one of the few opportunities to address it before it becomes permanent.
A deep conditioning or bond treatment usually goes in at this stage, too. Then the hair gets a fresh trim if needed, since extensions tend to cause breakage at the bond line, which should be cleaned up before reinstalling the extensions.
What Quality Reinstallation Actually Costs
Quality removal and reinstall work isn’t cheap, and the pricing reflects what the work actually involves. A proper takedown plus reinstall typically runs in line with the original installation cost, sometimes a bit less if the same hair is being reused. Trying to save money by skipping the salon and doing a self-removal between cycles is usually where the worst damage happens. The cost of fixing that damage later, whether through replacement extensions or dermatologist visits for traction issues, ends up exceeding what the original removal appointment would have cost. There’s no real shortcut around paying for the work to be done correctly.